memories in the making
a moment in time
It’s funny the things that stick in our minds from our youth. The simplest of events, common objects we’ve elevated, certain sounds or smells, cherished foods. When it comes to things we absolutely loved to eat, when revisited in adulthood do they ever taste as good as we remember?
While some dishes are best left on memory lane, there is one that has haunted me in relentless pursuit. Macaroni and cheese. Perhaps the simplest of comfort foods is incredibly difficult to replicate. Crispy brown on top, crackling on the bottom, creamy dreamy in the center.
I can’t tell you how many versions of mac and cheese I’ve made over the years. Some start promising then once baked become grainy and tasteless. A few months back I stumbled upon a recipe promising to replicate Stouffer’s.
I don’t know about you, but if you started high school in the mid-70’s, Stouffer’s frozen macaroni and cheese was a late-night phenomenon. My best friend’s mother used to drive to the Stouffer’s headquarters in Solon, Ohio and pick up cases to put it in their deepfreeze. Can’t count the number of post-party nights we would convene in their kitchen waiting for our little plastic trays to bubble and brown in the oven. Was it so good, or was it bonding under those turquoise cabinets? A bit of both for sure!
I made this Stouffer’s inspired version over the Fourth of July for a family cookout at our new Utah home, Here’s the recipe for creamy baked macaroni and cheese. Be sure to read the bottom of this post, because this dish wasn’t the only thing to make a lasting memory that weekend.

Bring a large pot of water to a boil and season generously with salt. Add one half pound cavatappi or elbow macaroni and cook according to package instructions, stirring occasionally until just past al dente. Drain and set aside.

Return the empty pot to the stove over medium heat. Melt one-quarter cup butter and simmer, whisking occasionally. Add one-quarter cup flour and cook, whisking, until smooth, about one minute.

Whisk in three cups milk. Raise the heat to high and bring to a simmer, whisking constantly, then immediately reduce the heat to low and continue simmering until the sauce lightly coats the back of a spoon, two to five minutes. The sauce should be smooth and relatively loose. Remove the pot from the heat.

Whisk in a quarter teaspoon mustard powder, one eighth teaspoon onion powder, a pinch of cayenne, a big pinch of kosher salt and several grinds of black pepper.

Whisk in one half pound of grated cheddar, four ounces of torn Velveeta, and two ounces of grated Pecorino Romano cheese

Whisk until melted and smooth.

Add the drained pasta, stir until the pasta is evenly coated in the cheese sauce. Taste and adjust seasoning with salt and pepper.

Transfer to an 8”x 8” baking pan or 6-8 cup dish. At this point the pasta can either be baked immediately, covered and reirrigated for a day, or sealed and frozen for up to three months.

Bake in a preheated 350-degree oven until bubbling at the edges and brown on top, 20 to 30 minutes.
And now for a real memory maker. For some reason my 20-month-old grandson in LA thinks I have a firetruck. Not sure where that came from, but every time he sees one, he exclaims “Meemo’s”!
One of the great things about living in a small town is that you can interact and approach people you never would in a big city. Knowing that that my grandson was coming to stay with us I reached out to the Park City Fire Department to see if by any chance I might come by a station to say hi and if they would be kind enough to bend the truth and say that one of the fire engines in the house was mine. They responded with a resounding “of course, come by any time”!
The Saturday after the fourth we jumped into the car and headed off for an “adventure”. When we arrived at Station 37 firefighters Ron and Hudson not only greeted us at the door, they asked Lincoln if he wanted to drive Meemo’s fire engine!

Up the two of us went and with lights flashing we pretended to drive around. My grandson was paralyzed in awe. It was as if he had walked into the bathroom and saw Santa Claus brushing his teeth and the Easter Bunny in the bathtub.

I can’t thank the Park City Fire Department enough! This outing, just like the mac and cheese, is one we will all remember for years to come.
new heights
food detective
Certain milestones deserve distinct celebration. As our new reality gave way to a new location, I knew I would need to find a proper place to ring in my husband’s 70th. Those who know Dave, know he loves his “brown” liquids. Luckily our new hometown is home to High West Distillery. What I didn’t know was that they have this lovely little cottage that serves an intimate prix-fixe menu curated with whisky pairings. I set a reminder on my calendar to call the moment reservations at Nelson's Cottage would be released.
The evening did not disappoint. We were greeted on the porch with a welcome cocktail and an array of delectable pre-dinner bites. I don’t know what I loved more, the Paper Plane or the adorable handblown glass in which the drinks were served.

As we sat down to dinner, the Cottage’s whisky ambassador kicked off the meal with a lesson on whisky tasting, how to pair whiskey with food, and a brief history of whiskey in Park City, Utah.
The six-course meal was unbelievable. If you’ve ever been to Alinea in Chicago, here’s its western counterpart. First came a chili crisp grissini with a charred scallion and ginger butter. Then ahi tuna with blistered cherry tomatoes, ramps and bonita flakes and a pairing of Bourye ’24. A refreshing palate cleansing heart of palm salad with watermelon relish, cucumber, snap peas with a yuzu chili oil. I slightly swooned over the roasted red snapper with asparagus and this to-die-for miso sweet and sour sauce which was paired with a High Country ’23 bourbon. Next up a bone-in Iberian pork chop with black garlic jus, collard greens, fava beans and yuca paired with A Midwinter Night’s Dram Act II. A savory sweet finish of brioche bread pudding with blueberry ice cream and double rye caramel sauce and the final pairing of the evening a barrel finished Manhattan.
Hand’s down it was one of the top meals I’ve had. I knew I needed two things. First the components of that heavenly miso sauce and some of those killer little glasses so I could craft my own welcome cocktail to greet guests in our new house. I succeeded on both counts.
After a brief but relentless rendition of “food detective” I got what I needed for that ethereal sauce. Turned out the base was coconut cream not butter. And I discovered that the distillery had a little store that sold its bourbons, ryes and their collection of signature glasses. Score!
Unpacking boxes and trying to make those first at-home dinners is a real challenge. Thankfully I found enough utensils to replicate that sauce. The first time with grilled scampi and asparagus with a cilantro rice. It was phenomenal but I was so tired I forgot to take a picture. Next up grilled salmon, roasted Yukon gold potatoes with asparagus drizzled with what is sure to be my go-to sauce of the summer.
Here is my rendition of the Cottage’s miso coconut cream sauce.

Melt a tablespoon of unsalted butter in a medium saucepan over medium/medium-low heat. Add the finely chopped shallot and sauté for two minutes until softened.

Whisk in a tablespoon of white miso paste.

Cook whisking occasionally until it starts to caramelize about one to two minutes.

Whisk in a tablespoon of dry white wine and simmer for a minute.

Stir in a half cup of coconut cream.

nd one-quarter teaspoon mirin rice wine.

Simmer for two minutes until the sauce thickens slightly.

Season with salt and freshly ground pepper. Off heat stir in one tablespoon of freshly squeezed lemon juice.

A perfect accompaniment to so many dishes.

If you’re ever in Park City, come on by- your Paper Plane awaits.
change in perspective
a moment in time
It’s crazy how an unforeseen event can turn your entire life in a different direction.
At the end of February, I had to jump on a plane to attend to a family matter. Five days there I received a hysterical phone call that our apartment in Chicago was ruined. I had trouble understanding the urgency of what might have happened. I tried to reassure the person on my cell, picked up a landline at my father’s and called our building’s super. A minute later he entered the apartment and then I heard them both screaming.
It's very surreal to be on the phone trying to envision the distress the people are experiencing on the other end of the line. I knew I needed to get up there and see what was going on. I also knew I was in great hands with our wonderful superintendent, Eddie, who I knew would immediately put a plan into action.
Turns out an old, galvanized pipe from the boiler system to our living room radiator had broken off. For at least ten days every time the boiler blew during those chilly February days and nights in our 1920s building overlooking Lake Michigan, are apartment filled with steam. When the door was finally opened, it was as if our entire apartment was a Turkish steam bath. It was a complete loss.

I loved that apartment for so many reasons- the view, the location, being back in an urban setting which really fed my soul. But living in downtown Chicago was never a good fit for my husband. He is a true country boy, one of his many charms. Driving in the car New Year’s Day we started discussing where we might both want to live when our lease was up this coming summer. Turned out- the universe had an accelerated timeframe.
Ever since my youngest moved to Park City, Utah she would periodically text me Zillow listings saying she thought we should move there, and that we would really love it.
Standing in my apartment with a N95 mask on and tears in my eyes I knew we had to move, and right now. If anyone needs a moving company in Chicago, Hollander Movers was truly beyond amazing. I made a phone call, and the owner, David, came over first thing the next morning. He reassured me that he could have me out of there the next day. Looking around at the chaos felt so overwhelming. With the seventeen ServPro fans blaring I thought it might be better if waited two days for everything to have a chance to dry out. We agreed on Monday. Sunday night the plaster ceiling in the living room fell in.
As the moving truck pulled away with more boxes than I could have imagined, I made my way to O’Hare. My husband and I waited for the truck to head west, then grabbed our dog and drove north to Utah to meet the van.
We were beyond lucky that our Park City rental was empty and when I asked if we could move in immediately, the reply was certainly.
One would think moving from an apartment in downtown Chicago to a house in Utah would have more square footage. Ironically the house was a little over half the size of our apartment, with no basement or attic. The dwelling-Jenga began.
Guardian angel number two arrived the same day as our moving truck. Allen from Cleanville in Salt Lake City met us to take all of our oriental rugs off the truck. Turns out he is an antique oriental rug buff, instantly recognizing where I purchased some of my rugs in Turkey. He whisked them away to be repaired, cleaned and restored. In the driveway I asked him if he knew of anyone who could clean and potentially demold all of our newly upholstered furniture. He said he was a restoration expert and arrived the next day. Can you hear Clarence’s bells ringing in “It’s a Wonder Life”?
Then came the unpacking, repacking because of the downsized space, insurance adjusters, antique furniture estimates. It all might have seemed too much if it wasn’t for that view.

This tiny gem of a home had a huge backyard that backed up to the Swaner Preserve with the Kimball Creek flowing right below. This past winter, I saw a recipe for ranch water in the New York Times. Never in a million years would I think come spring I would be drinking one in my very own backyard in Utah.
It’s a really great cocktail. And I have a feeling this is going to be a really good chapter in our lives. It’s interesting how one change can spark so many others. So many new beginnings, and holding all the older chapters lovingly in my heart.
Here’s the recipe for ranch water, adapted from Naz Deravian.

Fill a highball glass with ice. Add two ounces blanco tequila and one ounce freshly squeezed lime juice. Top it off with Topo Chico sparkling mineral water. Gently stir to mix. Serve with a lime wedge.

The recipe says to keep topping it off with Topo Chico to dilute to your liking and extend the life of the drink. Given all that’s been going on, I’ll probably pass on that top off.
shelter from the storm
food detective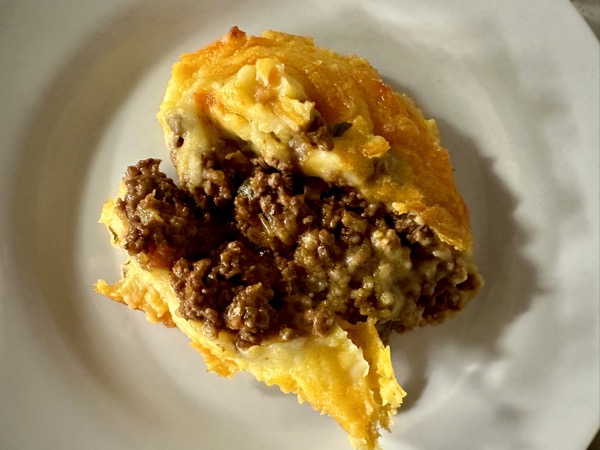
A series of atmospheric rivers have been pummeling the west coast of California and barreling into the Inland Empire. Our once sunny, dry oasis has become wet, drank and frigid.
Sweaters donned and fireplaces lit, it’s time for some good old fashioned comfort food. I adore shepherd’s pie, but it’s been eons since I’ve made it. So I poured myself a big mug of tea and set out to create a recipe that was sure to soothe.
This version comes together quickly, especially if you pick up “homemade” mashed potatoes from the prepared food section at your grocery’s deli.

On the way back from Jensen’s Finest Foods the view of our typically majestic Santa Rosa and San Jacinto Mountain range is completely obscured by the system rolling in from the south.

For shepherd’s pie begin by dicing half of an onion, a carrot, and a stalk of celery. Add to a high-sided skillet with one tablespoon melted butter along with two minced cloves of garlic and two sprigs of thyme.
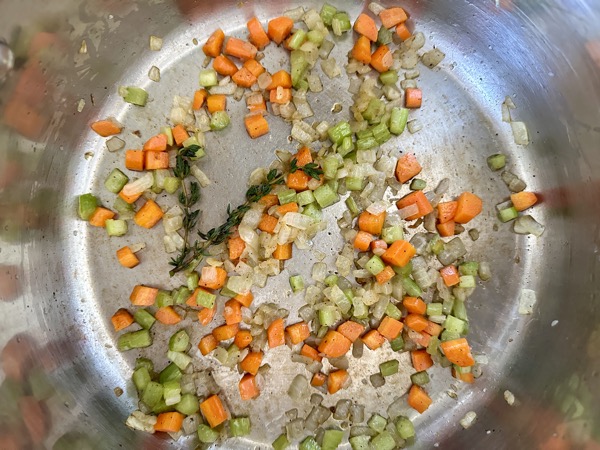
Cook over medium heat, stirring often with a wooden spoon, until the onions are translucent, and the carrots are just tender, about ten minutes.
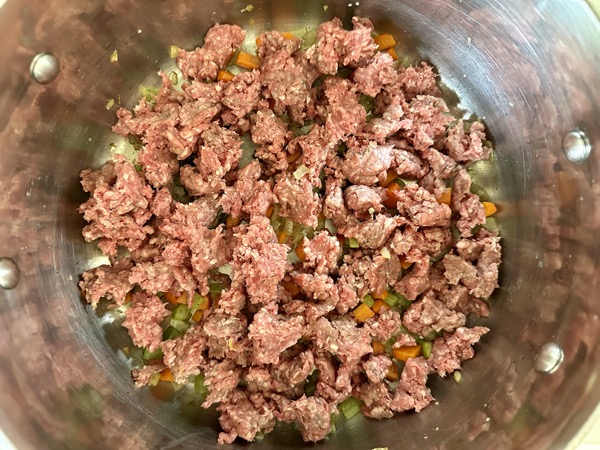
Add three quarters of a pound of ground beef, breaking the meat up with a spoon, continue cooking until it is no longer pink. Season to taste with salt and pepper.
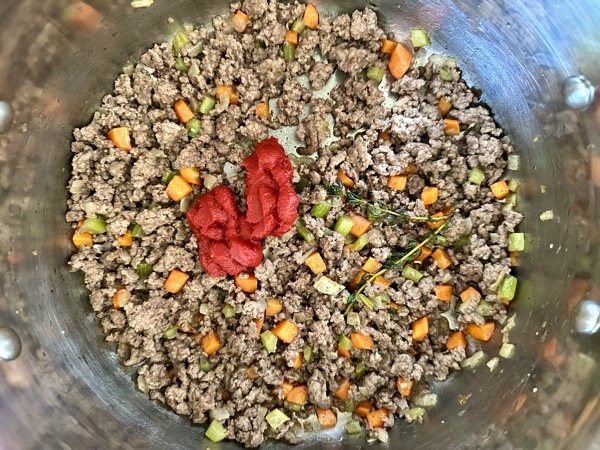
Add two tablespoons tomato paste and stir, cooking until it’s well combined, for another two minutes. Stir in one and a half teaspoons Worchester sauce and a teaspoon whole grain mustard.
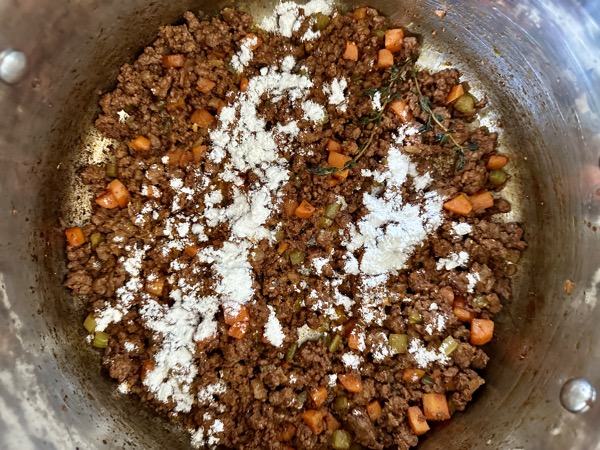
Sprinkle one tablespoon flour over the mixture and cook for one minute.
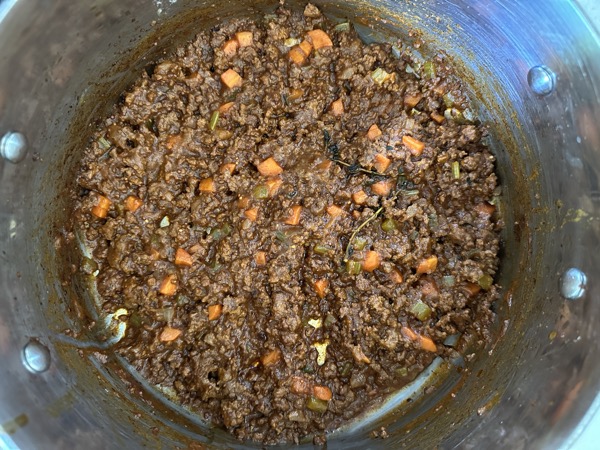
Add three quarters cup beef broth and cook, stirring, until the liquid has thickened slightly. Remove the thyme stems and stir in two tablespoons finely chopped Italian parsley. Season to taste with salt and pepper.
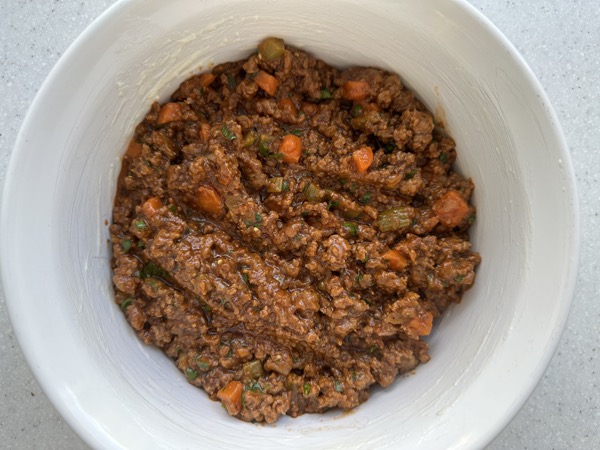
Place the meat mixture in a 1 ½ quart oven-proof casserole dish.
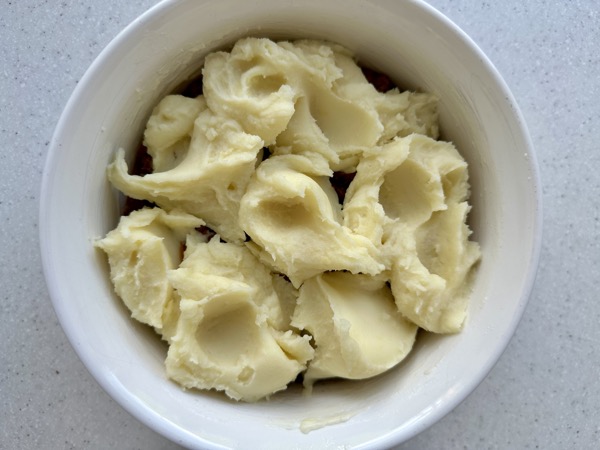
Top with dollops of mashed potatoes then spread them out over the top.
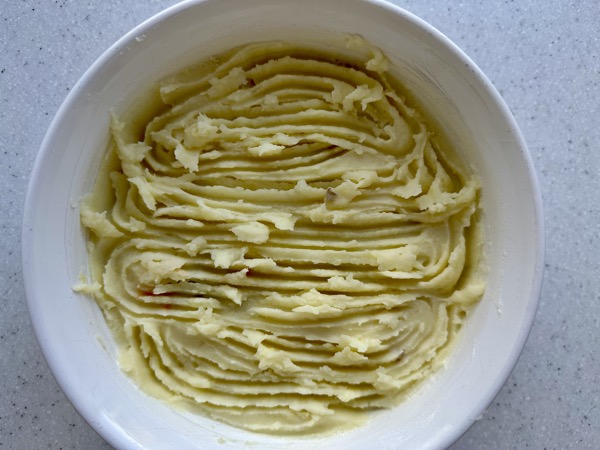
Drag a fork over the surface of the mashed potatoes.
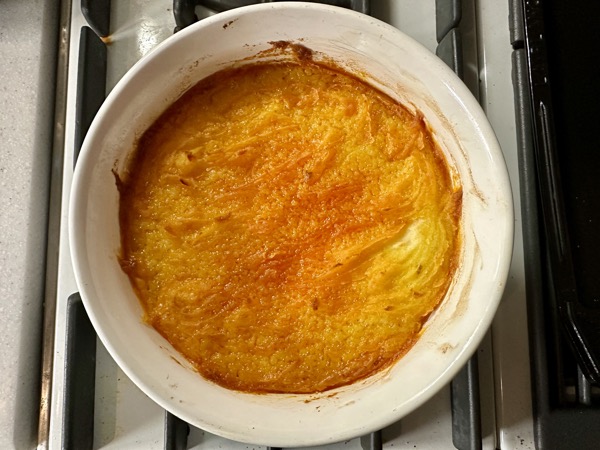
Place in a 375-degree preheated oven (if the mixture is at the top edges of your pan, set a foil-lined baking sheet underneath the pan to catch any drips). Bake the pie until the potatoes have begun to brown and the edges are bubbling, about 30 minutes. Let stand at room temperature for 15 minutes before serving.
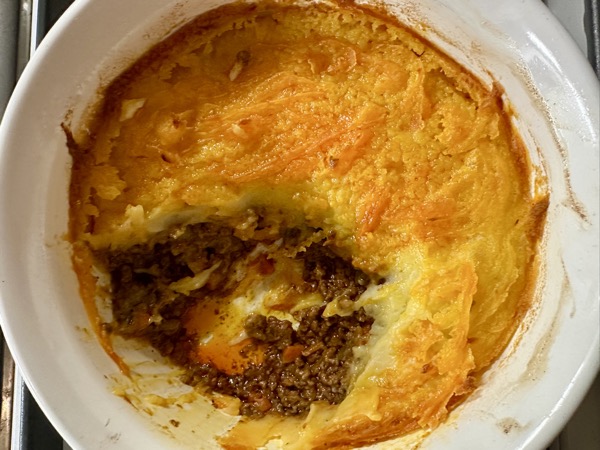
Generously serving two, this dish is as comforting as a cashmere throw on a chilly eve.
no baloney
food detective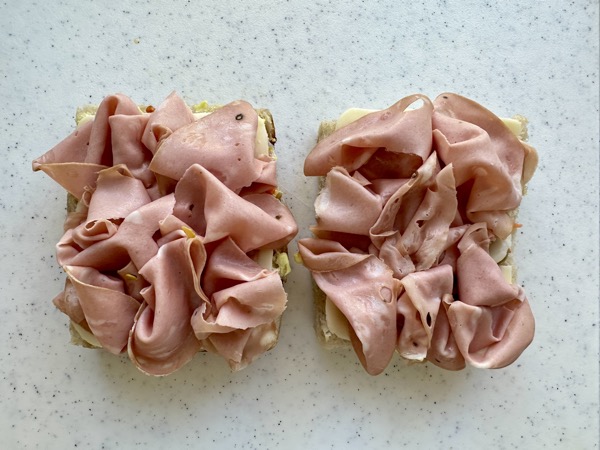
Mortadella, an emulsified pork sausage that’s been a staple for centuries in the Emilia-Romagna region of Italy, has become a recent rage. You’ll find it gracing charcuterie boards, elevating every sandwich it’s tucked into, and even whipped to create a transcendent canapé.
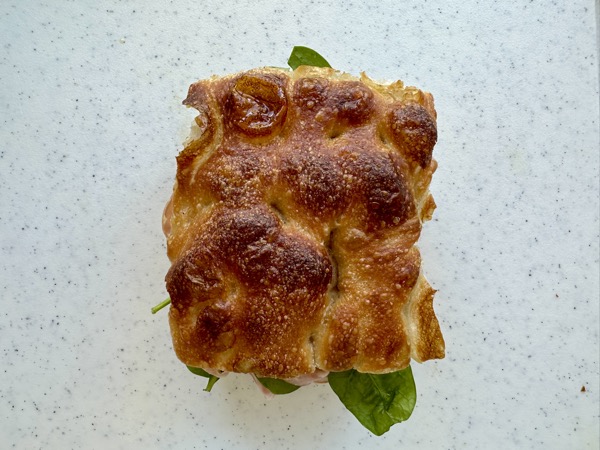
One of my favorite spots outside of Los Angeles is Milkfarm, an artisanal cheese shop in Eagle Rock. Not only do they have the most amazing array of cheeses and cured meats, but they also have what has to be the best sandwich board north of DTLA. My go-to is their mortadella muffuletta. A pillowy focaccia slathered with garlic aioli, spicy olive salad, slices of cheese, piles of paper-thin mortadella and a handful of baby spinach. To call it an ethereal eat would be an understatement.
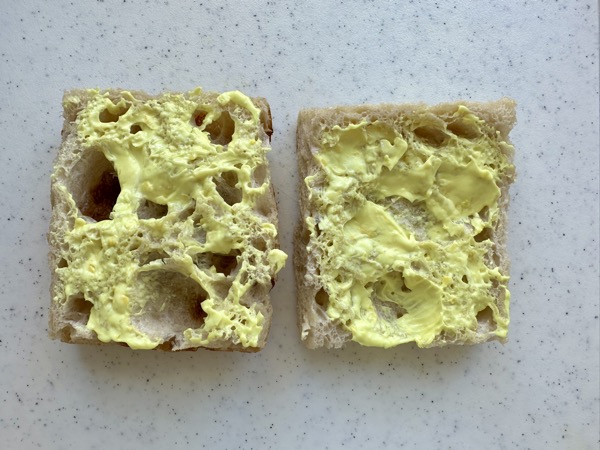
To make two mortadella muffulettas, split a 5x7 square of focaccia in half through the middle. Spread each cut surface generously with a tablespoon of garlic aioli.
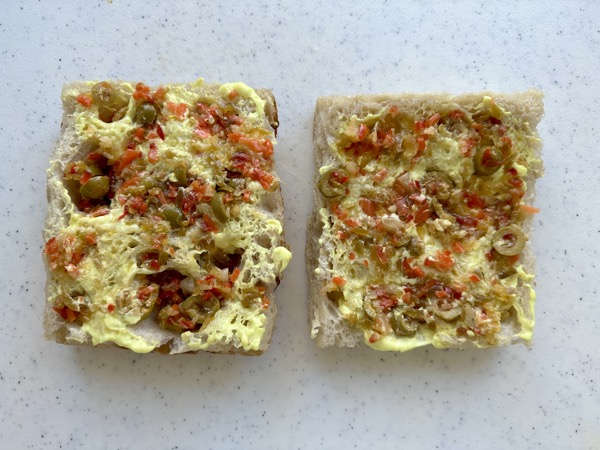
Top with three to four tablespoons of muffuletta mix to cover.

You can make your own, but this jarred version by Marconi is excellent.
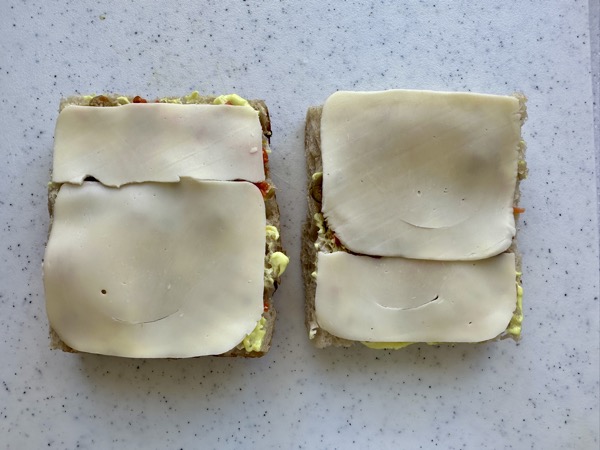
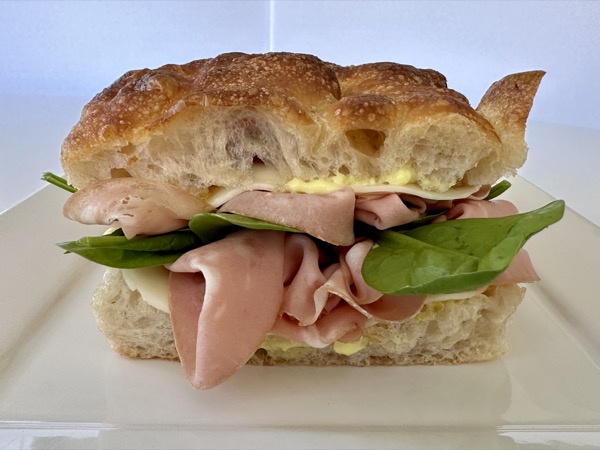
Layer with three to four thin slices of mozzarella.
Then a third of a pound of thinly sliced mortadella.
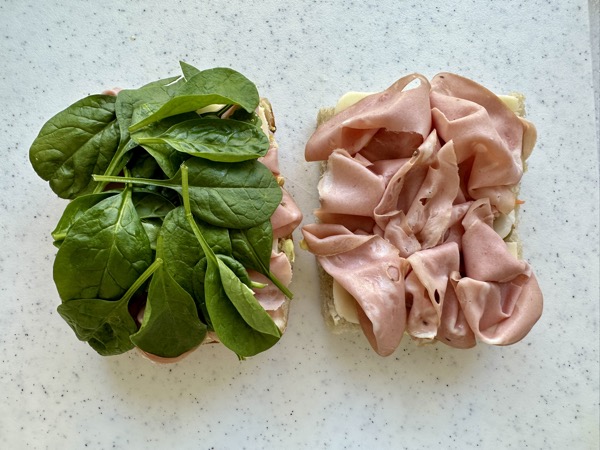
Top the bottom piece with a handful of baby spinach.
Carefully place the top on the bottom. Cut on the diagonal to create four triangular wedges.
I finally finished the second season of “The Bear”. I was thrilled to discover that the show’s last episode featured a savory cannolo filled with a mortadella mousse on its opening menu. What a trifecta- savory, mousse, and mortadella. This piqued my inner food detective, and just like fate a recipe for a mortadella mousse appeared in my NYT feed.
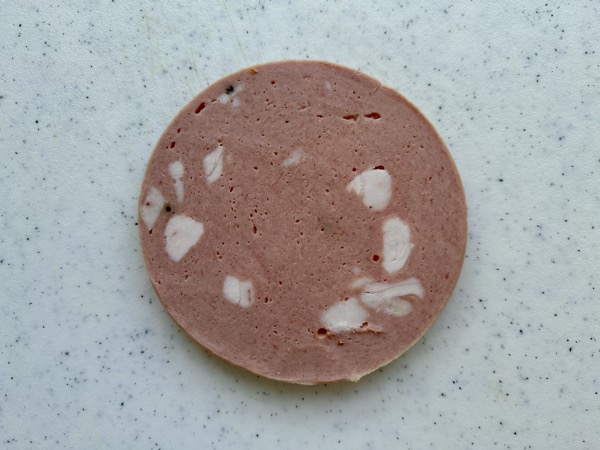
For the mortadella mousse canapés begin with a quarter pound piece of mortadella with the rind removed.
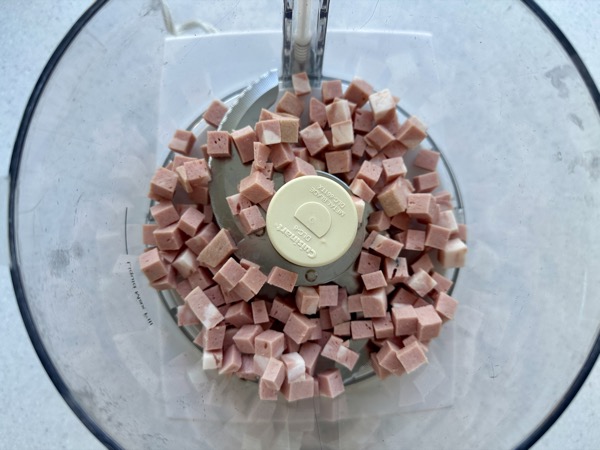
Dice the mortadella and place in a food processor.
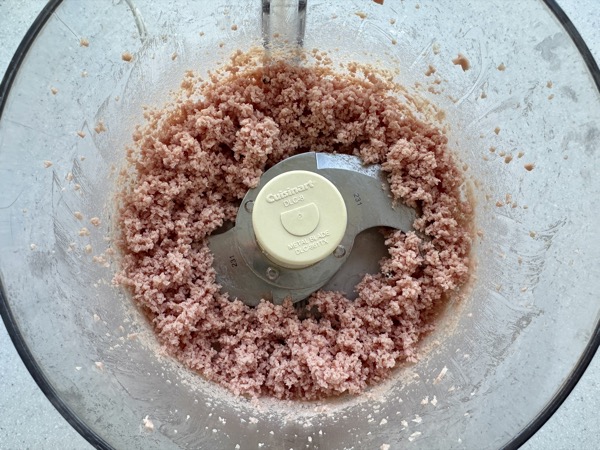
Pulse into a paste.
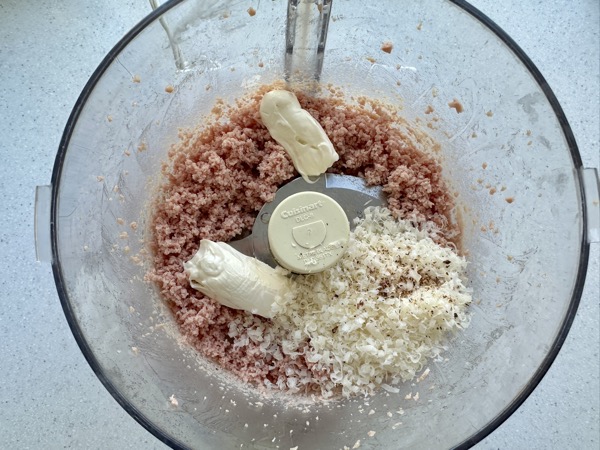
Add two tablespoons of mascarpone, three tablespoons grated parmesan cheese and a grind of nutmeg.
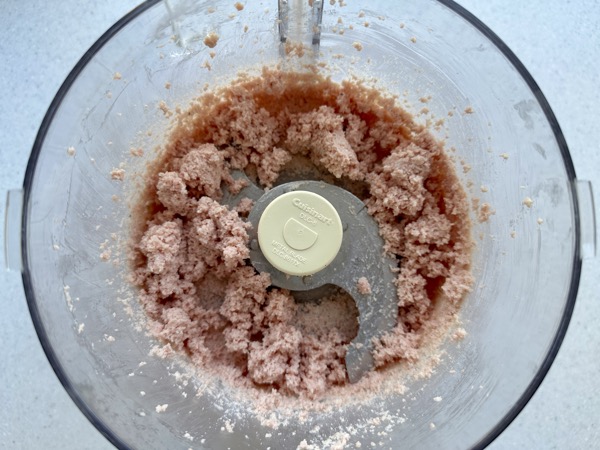
Pulse until blended.

Cover and chill in the refrigerator.
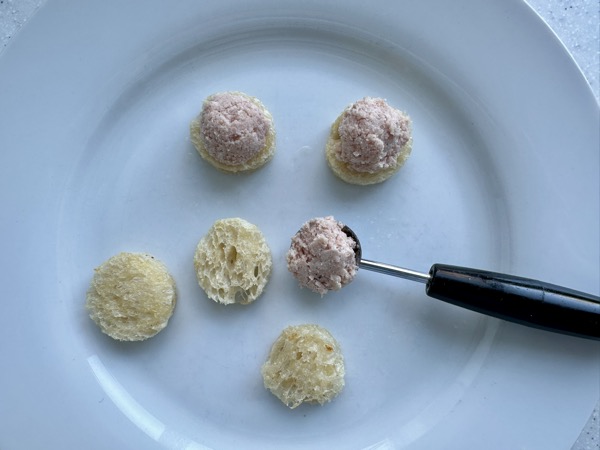
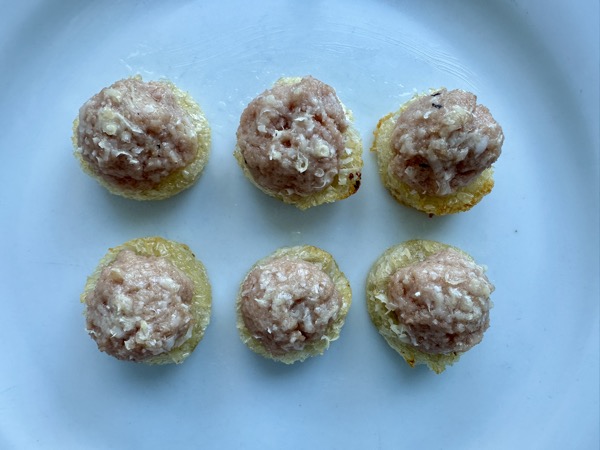
With a melon baller, scoop out a small ball of mousse and lightly press onto a toast round.
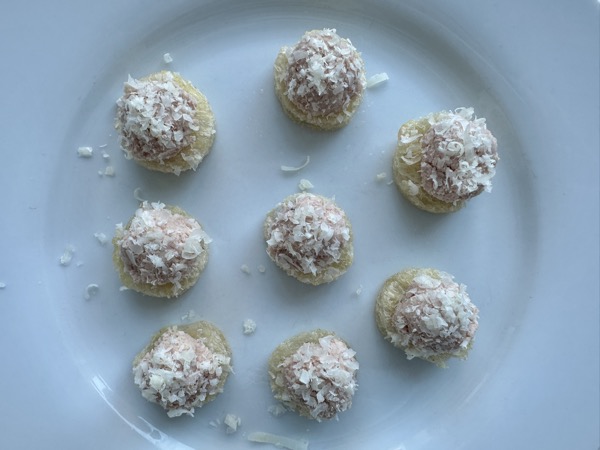
Preheat broiler. Dust each canape round finely grated parmesan cheese. Watching carefully, run under the broiler briefly, for about one minute, to lightly brown the top.
Jump on the mortadella bandwagon. You might just find yourself hot for this cold cut.
sealed with a kiss
dinner for two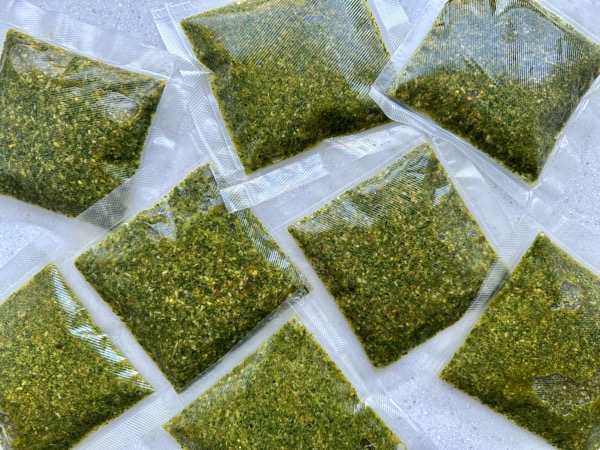
One of the ways I show love is by making meals for others. It’s such a gift to have a full table with everyone gathered around. But now with our children’s lives progressing and families expanding I often find myself traveling to their homes. This fall I had back-to-back weekends visiting my daughters in LA and Park City. Lucky Meemo got to babysit and during naptimes I decided to fill my daughters’ freezers with some of their favorite dinners so that they could feel my loving embrace for the weeks and months to come.
Certain dinners are made for the deep freeze. The best ones have their main component frozen then a quick fresh prep brings them to the table in minutes. What’s key is knowing how to store them in the freezer. Plastic containers can easily turn your freezer into an unwieldy game of Jenga. I learned this trick from one of my sons-in-law, he freezes everything in flat plastic bags. Once frozen, the filled bags stack vertically like books in a bookshelf.
At my daughter’s in LA, I used her Anova vacuum sealer. I cut squares out of the roll of plastic and then sealed the ends to make little bags. In Utah, I used Ziploc freezer bags. Both yielded excellent results. The only advantage with Anova sous vide bags is that you can place them directly in boiling water. But both defrost quickly, either overnight in the refrigerator or on the countertop because they are frozen flat.
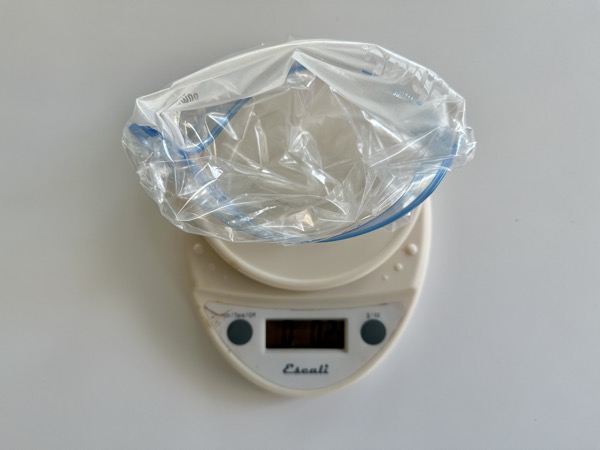
A kitchen scale is key in portioning servings.

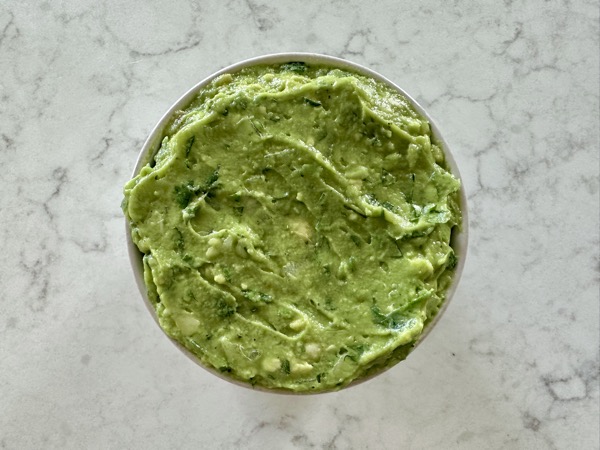
My pistachio pesto has a special kick thanks to the added mint, splash of soy and dash of tabasco. I prep several batches.
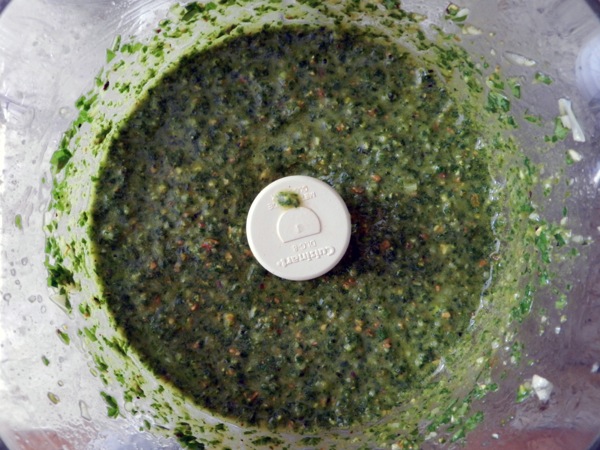
Give each a whirl in the Cuisinart.
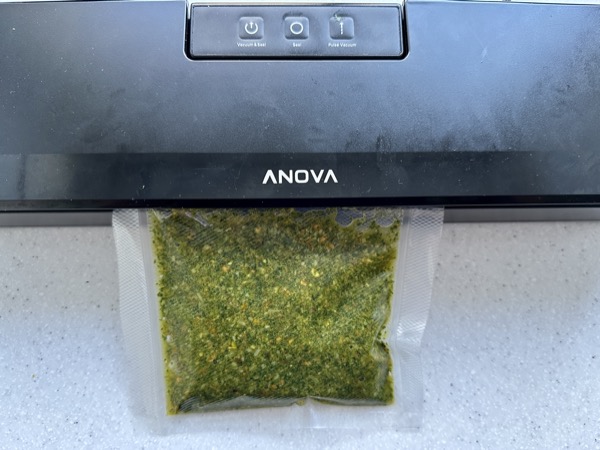
Then pulse- vacuum and seal the bag.
Penne with sausage is a family favorite. I make a double batch and portion it out.
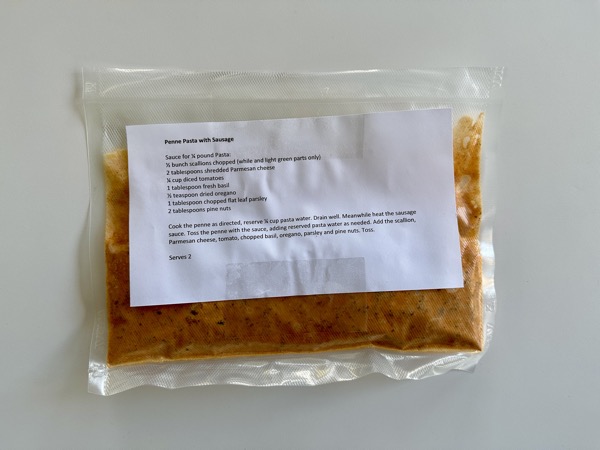
Then freeze with a printout of the serving instructions for added ease.
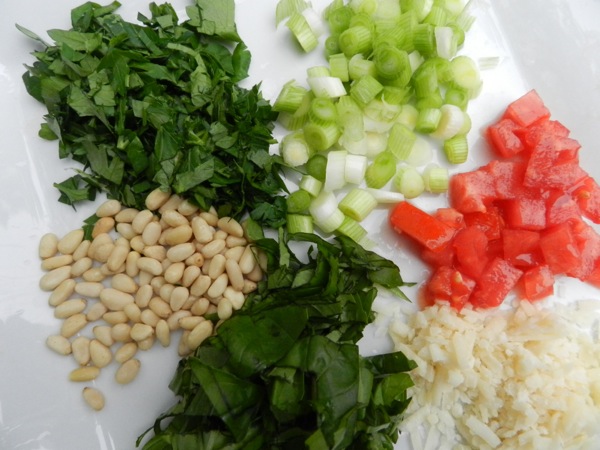
While the sauce warms, chop fresh tomato, scallions, parsley, and basil with shredded parmesan and some toasted pine nuts to toss with the sauced penne.
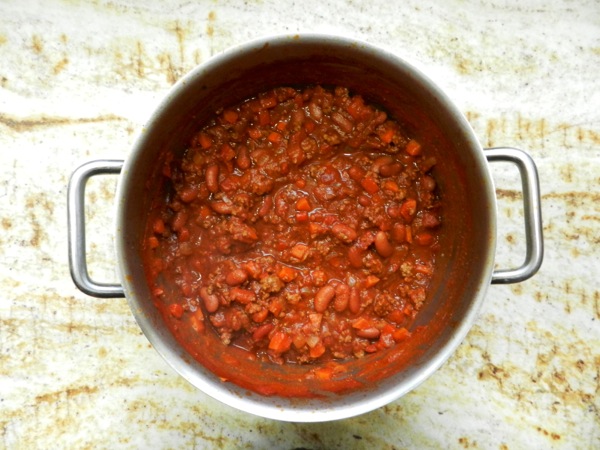
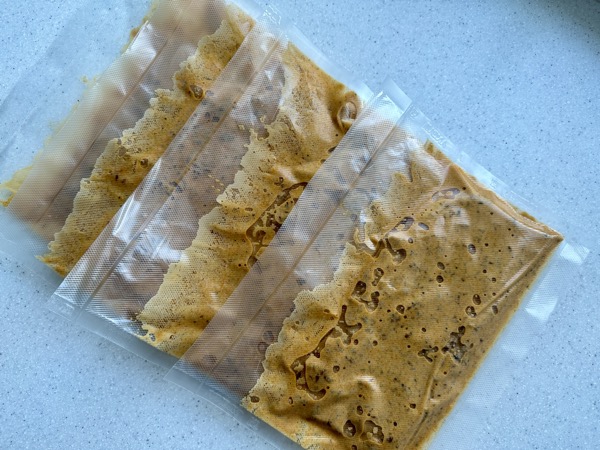
Be sure to make a double batch of this wonderful chili.
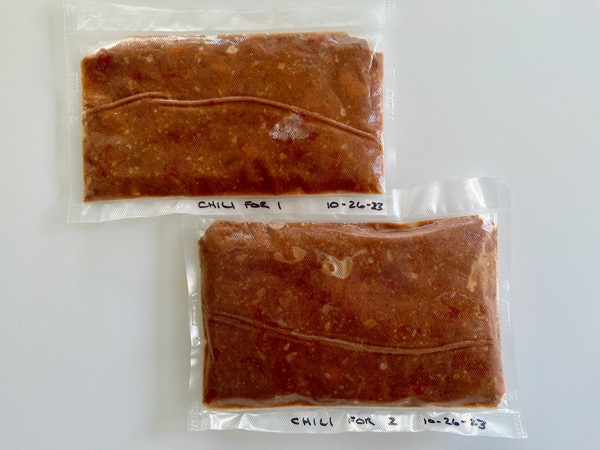
Then freeze it into servings for one and two.
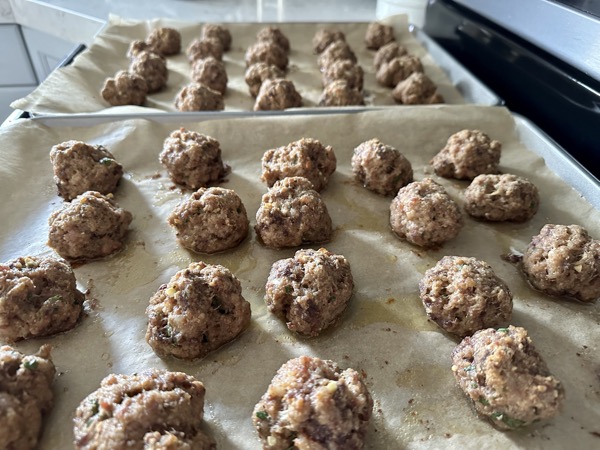
Make a double batch of roasted Italian meatballs.
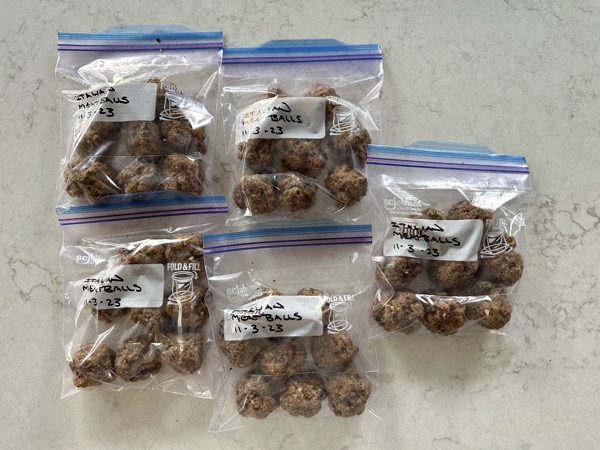
They are light and airy and freeze like a dream, simply defrost and warm in the tomato sauce.
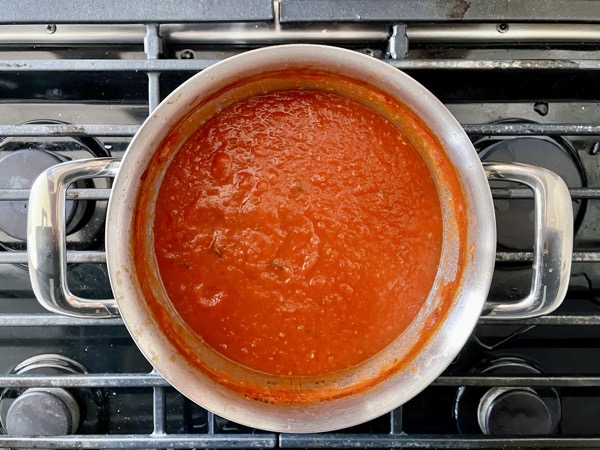
Basic tomato sauce is so easy.
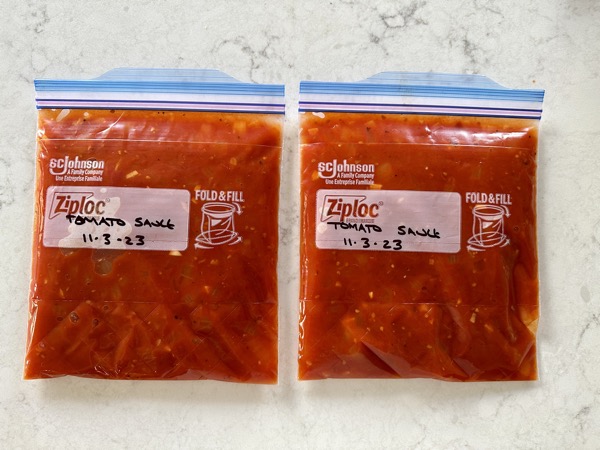
You will never open another jar.
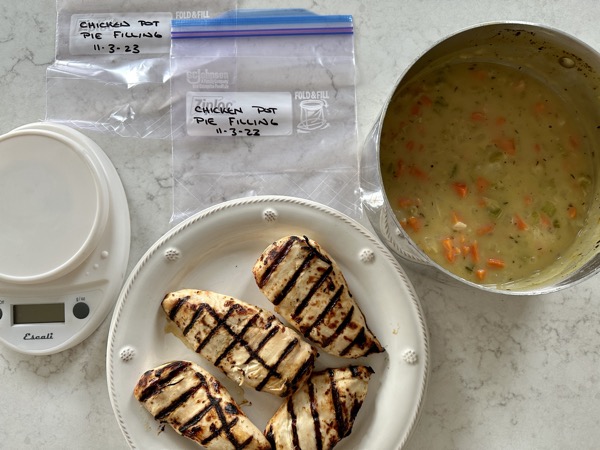
I like to serve my chicken pot pie filling in individual oven safe baking dishes and top with rounds of pie crust.
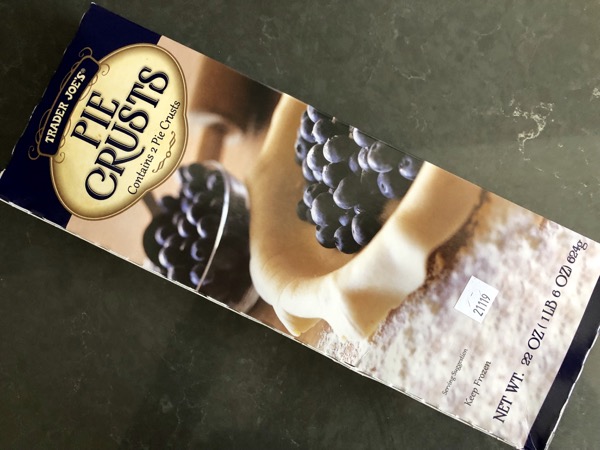
My favorite is Trader Joes rolled frozen crust.
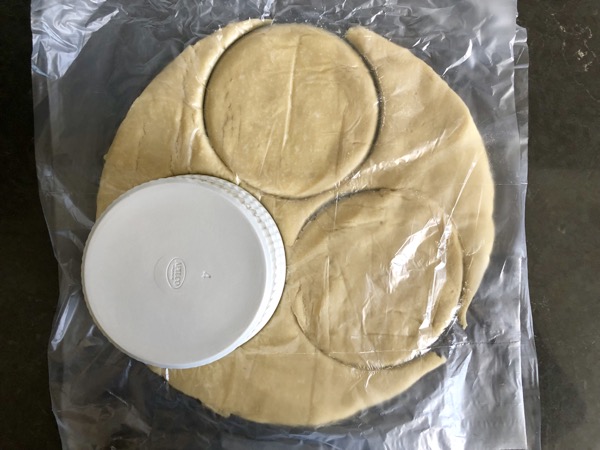
I thaw the pie crust on the counter for several hours, then unroll and use my baking dish as a “cookie cutter” to make discs.
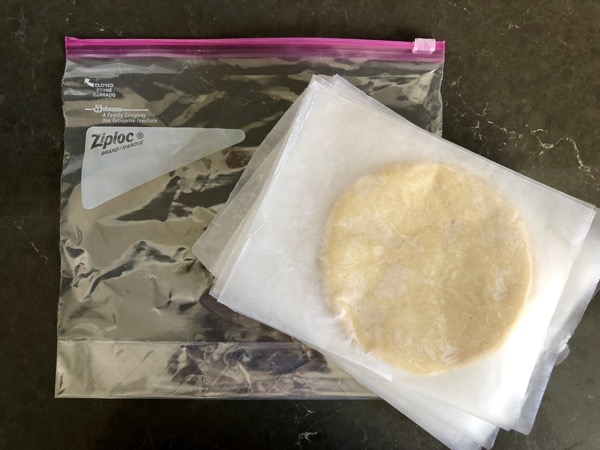
Layer in between wax paper and freeze.
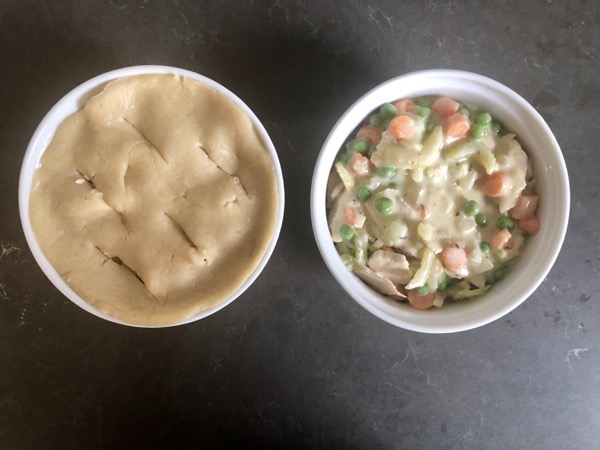
To serve, thaw the filling and two dough discs and pop in the oven.

Naptime has never been more delicious.

ear today…
food detective
Last week it seemed like summer might just be here to stay. Then mother nature took an about face. Temps plunged, skies darkened, and freezing rain arrived as the cold winds began to blow.
Sadly, that meant summer’s bounty was soon to hibernate. I don’t know why I am always surprised when the stalls at the farmers market dwindle. While you might still be able to find a stray tomato or sprig of herb, sweet corn departs abruptly with little notice.

Spicy corn and coconut chowder was one of my summer stables. Each Saturday I’d pick up a half dozen ears to make this satisfying soup.
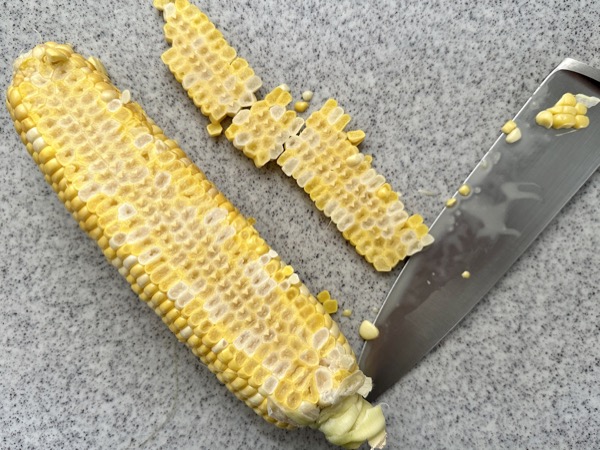
Cut the corn kernels off the cobs and transfer to a bowl.
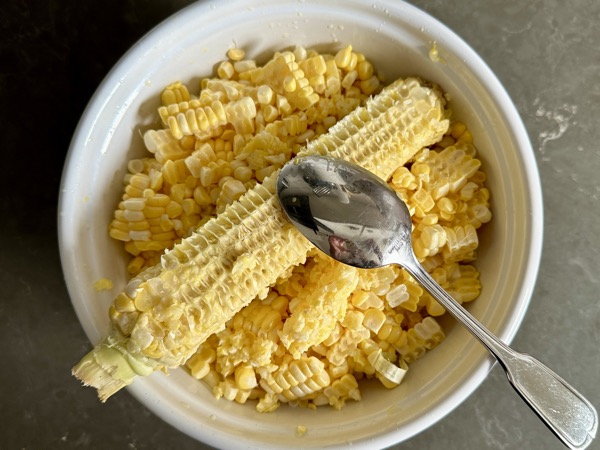
Using the back of a spoon, scrape the cobs to release the milky juices into the bowl with the kernels. Set aside. (If using frozen kernels, skip this step.)
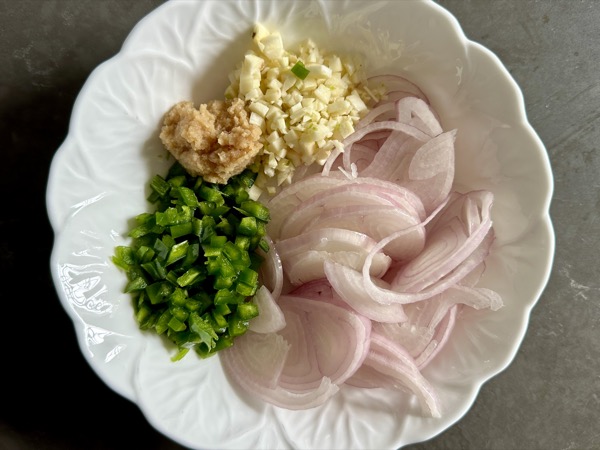
In a large stockpot over medium heat, heat two tablespoons olive oil. Add two shallots cut into rings, three cloves minced garlic, one 1-inch piece ginger minced, and one minced jalapeño pepper.
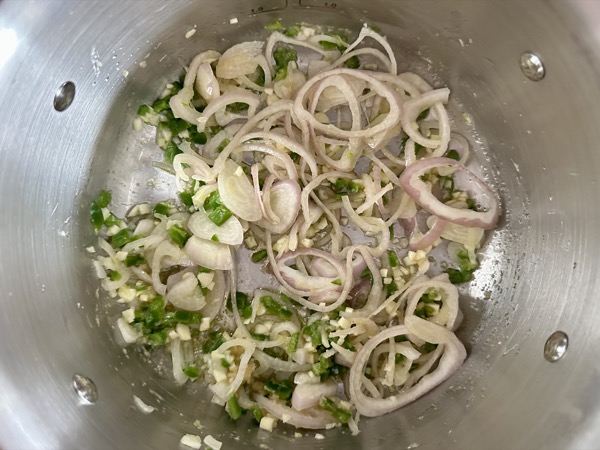
Sauté́, stirring occasionally, until soft, 3 to 5 minutes. Add the corn kernels and juices to the pot, sauté́ for 3 minutes more.
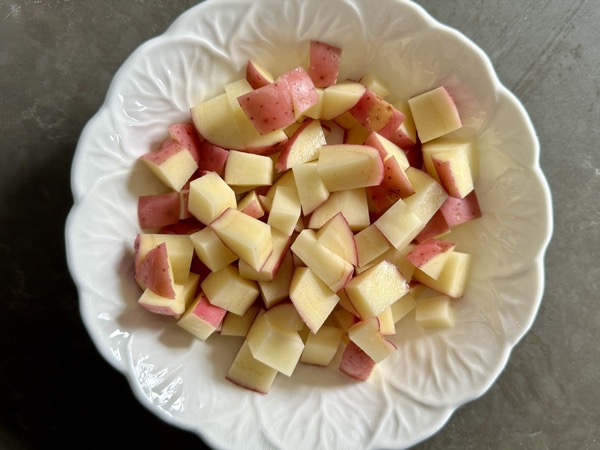
Add the diced potatoes, and stir to coat, 1 to 2 minutes.
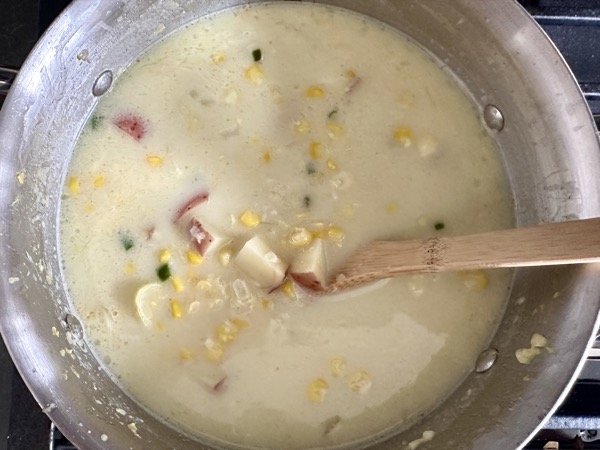
Add the chicken broth and coconut milk. Bring to a boil, reduce to a simmer, cover, and cook for 8 to 10 minutes, until the potatoes are tender.
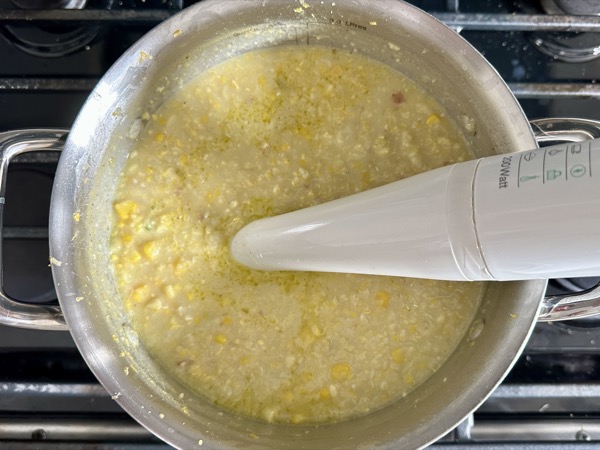
Using an immersion blender, roughly puree the soup. Season with lime juice and salt.

Ladle the soup into bowls and garnish with cilantro leaves and chopped scallions.
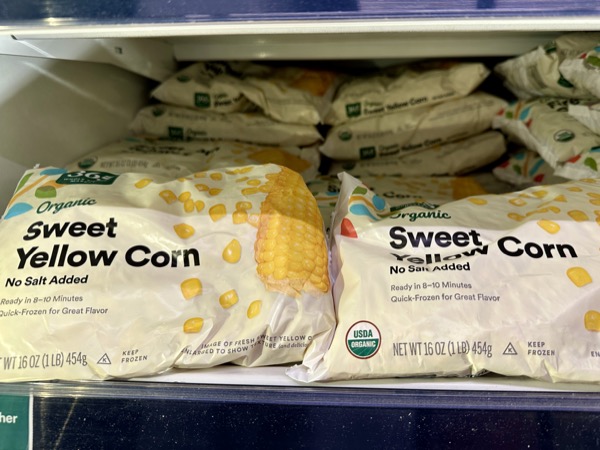
And while it’s not quite the same, this chowder can also be made with high quality frozen corn kernels. Opening your freezer drawer with its blast of chilly air a forebearer of what will soon happen when you step out your front door.

Watch out Willie!
raise a glass
food detective
Summer 2023 has had undeniable highs and a few rocky lows. Rather than lift a half-glass of rosé and whine, let me share a libation that has allowed me to toast the bounty of this summer season.
This watermelon margarita is perfectly balanced- slightly sweet, just enough acid, and a smokey kick mezcal instead of tequila. The pureed fresh watermelon gives it a silky freshness that’s certain to transport anyone to higher ground.
Earlier this summer it was the cocktail of choice when I was out in Utah helping to care for my newest grandson and his sweet mama.
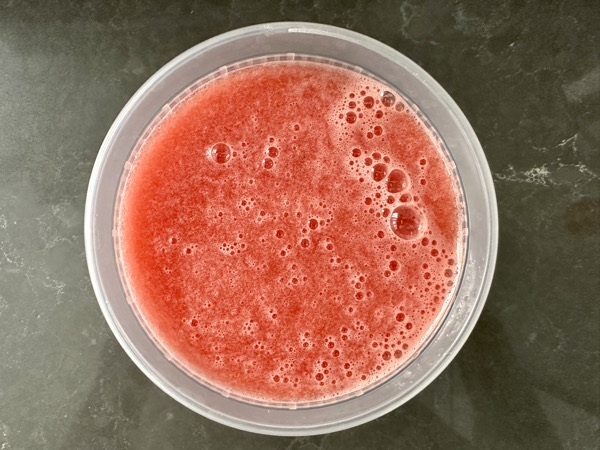
Cubed fresh watermelon from the grocery store makes prep a breeze. Puree about a cup and half until smooth, don’t strain as the pulp yields a delightful consistency to this drink.
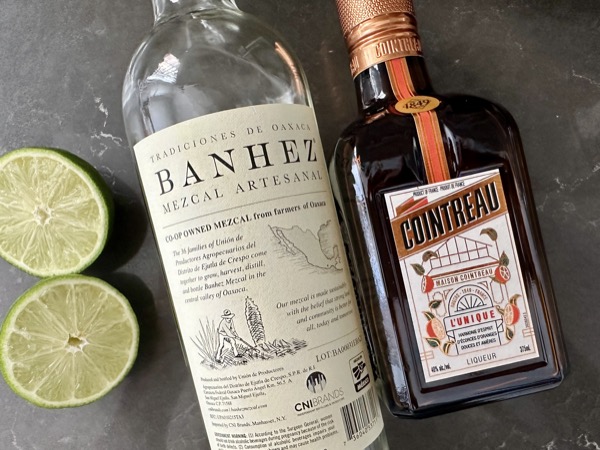
In a large measuring cup combine six ounces pureed fresh watermelon juice, two ounces Mezcal, two ounces Cointreau, and two ounces freshly squeezed lime juice, save the rinds for rimming the glasses.
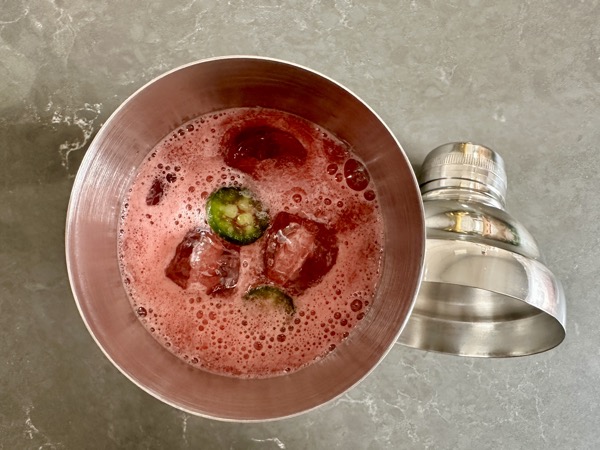
Fill a cocktail shaker with ice. Add the watermelon juice, Mezcal, Cointreau, lime juice along with two jalapeño slices. Shake well to combine.
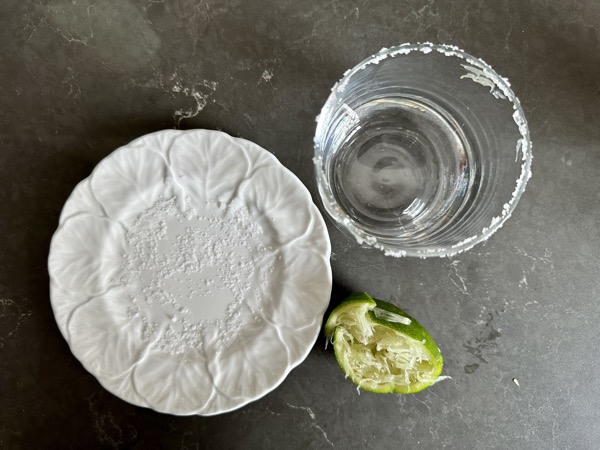
For the salted rim, combine a tablespoon sea salt with one teaspoon Tajín in a small shallow bowl or plate. Using one of the reserved lime rinds run it along the rim of two rocks glasses. Dip the rims into the salt mixture. Fill the glasses with ice.

Shake the cocktail shaker vigorously, then strain the margaritas into the prepared glasses. As a garnish cut a little slit into two jalapeño rounds and place one on each glass.

Enjoy these immediately. And while you do, take a moment to savor all the blessings that abound…


bundle of joy
perfecting the "done before they arrive" party- a work in progress
My newest grandson just arrived, and I am over the moon! What magic to be there for those first few days and weeks of life. Not only is little Peter perfect in every way, it’s incredible to see my daughter and son-in-law blossom into such amazing new parents.
One of my favorite things, other than holding that little sprite, is to nourish my loved ones while they adjust to their roles as mom and dad. Folding laundry, grocery shopping, filling the freezer and giving those parents early morning respite makes me exceedingly happy.
It never ceases to amaze how the hours of the day zip by, and the wee hours of the night tend to lag those first few days. For this reason, prepping and executing dinner needs to be done way in advance. The best suppers are those that taste great right out of the oven and at room temp. And if a meal can be morphed into another, all the better.
Chicken cream cheese enchiladas are such a comforting meal. An added bonus, any extra filling can be used to create an outstanding freezable canape to pop into the oven at moment’s notice when visitors stop by to catch a glimpse of this teeny man.
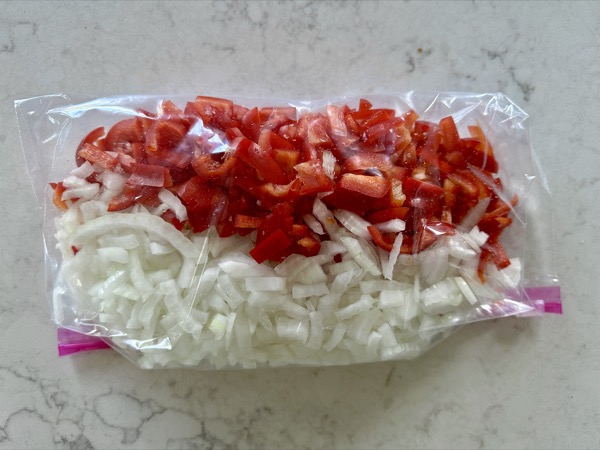
Early in the day peel and thinly slice a large onion and one to two red bell peppers. Stow in the frig in a Ziploc bag.
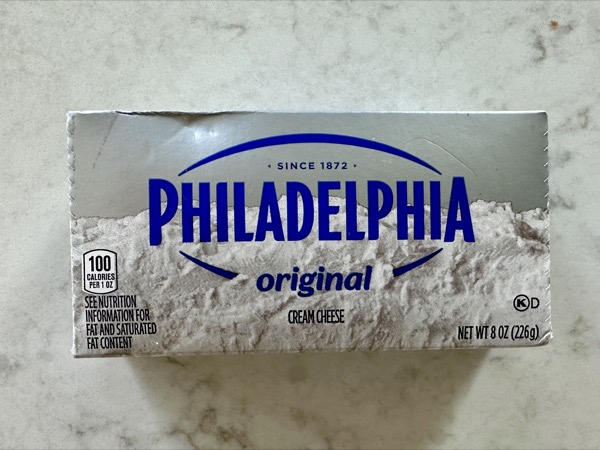
Let eight ounces of cream cheese come to room temp.

Pulled rotisserie chicken from the market is a delicious time-saver. Shred the chicken into smaller pieces.

Sauté the onion and red peppers in a large skillet over medium heat until softened and the onion is translucent. Stir in the chicken.
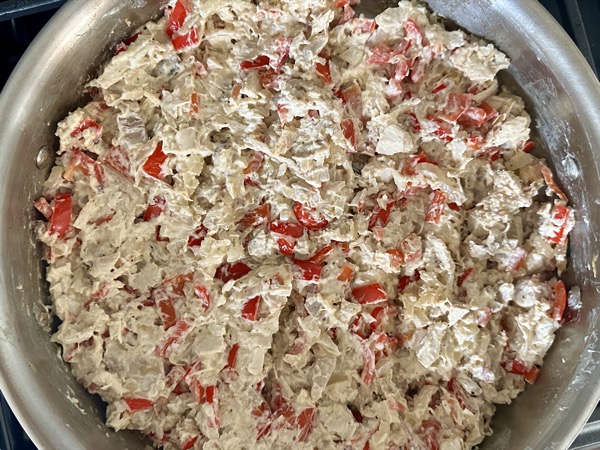
Fold in the softened cream cheese. Season with salt and pepper. The filling can also be made earlier in the day, cool to room temp, then refrigerated.
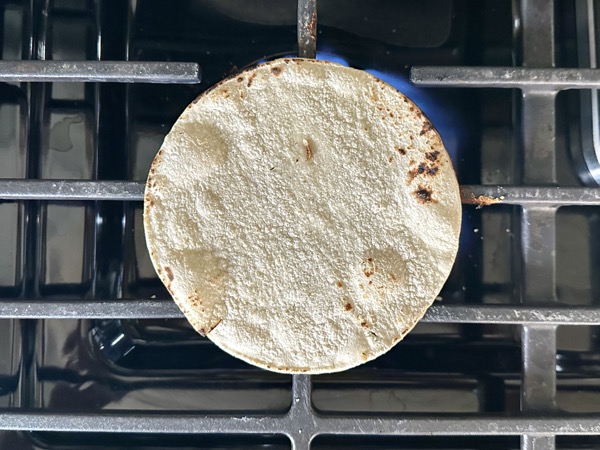
Warm corn tortillas per directions on the package. I like to do this on an open gas flame until pliable and lightly browned in spots.
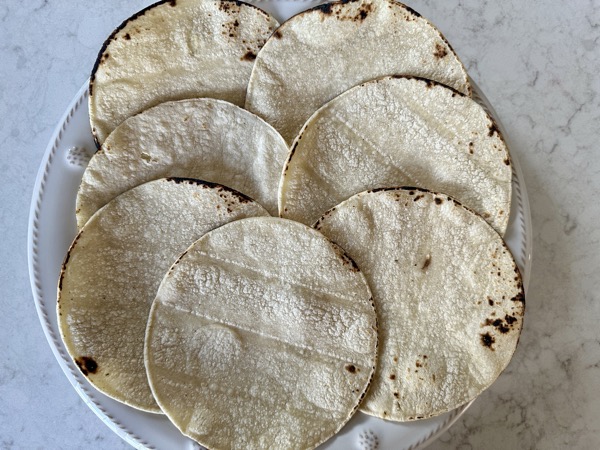
The tortillas can be prepared earlier too.
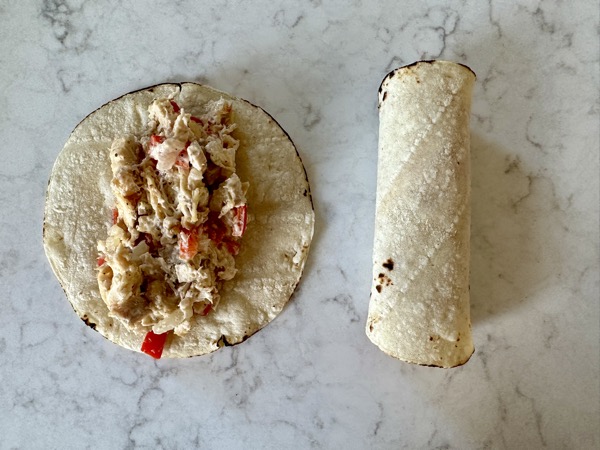
Spoon ½ cup chicken onion mixture into each tortilla.
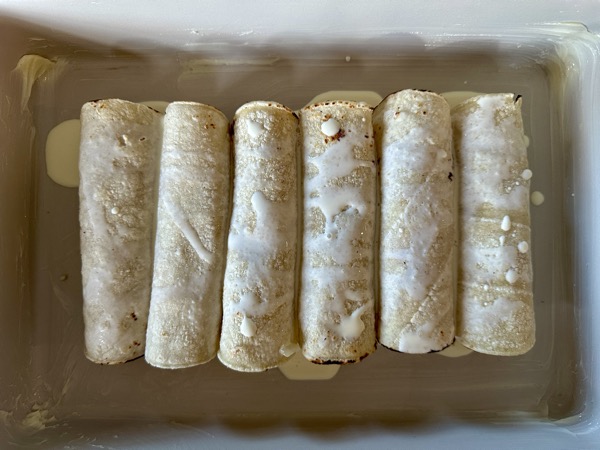
Roll up and place seam side down in a buttered casserole dish. Drizzle with heavy cream. Bake until heated through in a preheated 375-degree oven for 25 minutes.
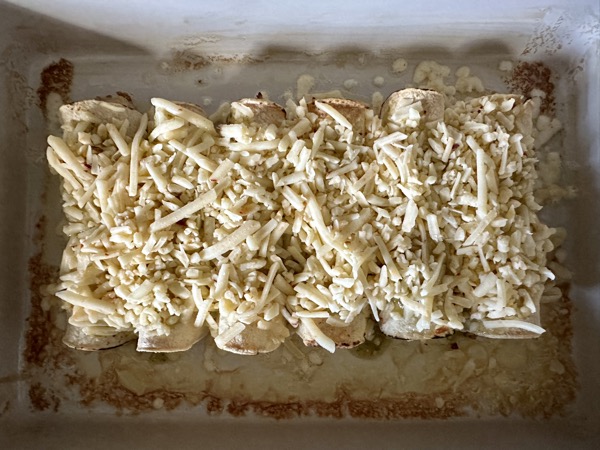

Remove from the oven, sprinkle with monterey jack cheese, return to oven and continue baking until cheese is melted. You can also turn on the broiler at the end to get the tops nice crispy.
Great with guacamole, salsa and a ranch salad.
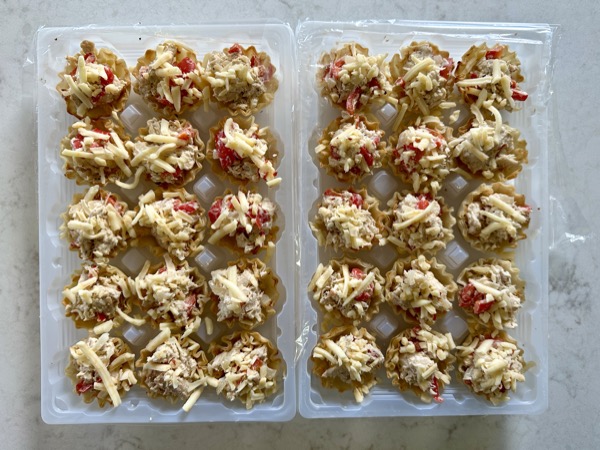
For a fabulous freezable hors d'oeuvre, spoon any extra filling into frozen fillo cups from the freezer/dessert section in the grocery store. You might need to chop the filling with a knife if it has larger pieces. Sprinkle with a little Monterey jack cheese. Cover with plastic wrap and place back in the box.
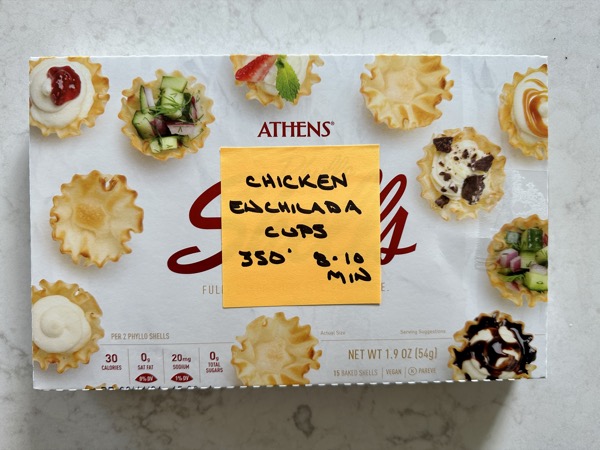
To serve preheat the oven to 350 degrees. Remove the frozen cups from the plastic tray and place on a baking sheet and bake until bubbly and cheese is melted, about 8-12 minutes.

With this latest grandchild my swaddling skills have really improved. Might be my best little burrito yet!
figs & pigs
food detective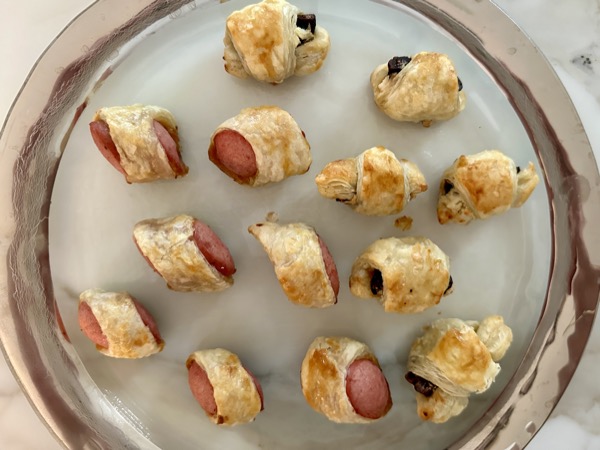
It’s a wrap! Recently I had two puff pastry requests. One was to bring my pigs in a blanket to a friend’s cookout. The other was to come up with a recipe for a fig in a blanket that a friend had at a cocktail reception and claimed was divine.
At the barbeque my buddy was doing a blind tasting of several different strip steaks. One was prime dry-aged, another from a high-end boutique butcher, and the third from Costco. The host was going to grill each on his Big Green Egg, then each of the guests were to rate them. After the tally was done, the strips’ identities were to be revealed. I figured why not kick off the evening with my own bake-off and let everyone also declare their favorite- figs or pigs.
![]()
My pigs in blankets are a step up. Using high-end long wagyu frankfurters from the butcher makes all the difference.
![]()
Thaw the puff pastry at room temperature for about twenty minutes.
![]()
Lightly beat an egg for the egg wash.
![]()
Roll out one sheet of puff pastry.
![]()
Lay the hotdogs on the puff pastry and cut the pastry into rectangles.
![]()
Lightly brush one edge of each with honey mustard and the other with the egg wash.
![]()
Roll the frankfurters up in the pastry, pressing the seams to tightly seal. Seam side down, brush the tops with beaten egg. Sprinkle lightly with flaky sea salt. Cut each at an angle into half-inch pieces.
![]()
For the figs in a blanket use black mission figs in the produce section of the grocery store.
![]()
Cut a sheet of thawed frozen puff pastry lengthwise into five strips, then cut crosswise into thirds to make 15 rectangles.
![]()
Slice each rectangle diagonally to make 30 triangles.
![]()
Spoon one half teaspoon goat cheese onto each triangle and top with a halved fig. Drizzle with a little honey.
![]()
Wrap the pastry around the fig and press to seal.
![]()
Place on a parchment-lined baking sheet, brush with beaten egg.
![]()
The figs in a blanket can be frozen at this point and baked later. Cover the baking sheet with foil and place in the freezer until frozen. Then place in a zip-loc bag and freeze for up to three months.
![]()
The same goes for the pigs in a blanket. Making both the perfect go-to appetizer for any gathering.
![]()
Preheat the oven to 400 degrees. Place the frozen figs in a blanket on a parchment lined baking sheet. Bake until puffed and golden, about 18 to 20 minutes.
![]()
I can’t wait to share this recipe with my friend Lou. I hope it surpasses her expectations.
![]()
As for you, be sure to cast your vote for the winner of this wrap-off!
post a comment
 Wherever I find myself, I’m happiest with a full dining room table. As a former professional chef and caterer I want to share what I’ve learned over the past three decades of entertaining. On this site you’ll find tricks of the trade to help even the most harried of you pull off a seemingly seamless fête. Come join the conversation!
 read more →